Registering a domain is the easy part. Registering the right domain, paying for the correct order, and knowing where to manage DNS, nameservers, and renewals afterward is what keeps you out of trouble.
This guide walks through the full domain flow in Momo Cloud, from choosing an available name to managing it later in the client area at cloud.momo.tz. The examples stay close to what is visible in the interface so you can move through each step with confidence.
Select Your Domain
Once your search results show the domain you want as available, click Register next to that exact result. This tells the system which domain you want to order and moves you from search into the purchase workflow.
On the results screen, you will typically see the domain name, its availability status, and the registration button on the same row. For example, if myfirstsite.co.tz appears with an Available label, clicking Register on that row starts the order for that specific name.
What clicking Register does
Clicking Register confirms your selection and opens the domain order screen. From there, you can review the chosen domain, check the registration period shown, and continue with contact details, optional services, and payment.
Before moving on, pause and confirm the spelling carefully. Domain names are literal. A small typo such as myfristsite.co.tz instead of myfirstsite.co.tz means you could order the wrong domain entirely.
If your first choice is not available
If the name you want is not available, a small adjustment is often enough. You might try a shorter version, add a location or service word, or search using a different extension that still suits the project.
- a shorter version of the same name
- a name with your location or service added
- a different domain extension that fits the project
Keep alternatives clear and memorable. Avoid unnecessary hyphens, awkward abbreviations, or spellings that are hard to say aloud, especially if the domain will appear in marketing, email addresses, or printed material.
Tip: Before clicking Register, double-check both the name and the extension. .co.tz, .com, and other extensions can look similar in search results, but they are separate domains.
Configure and Review the Order
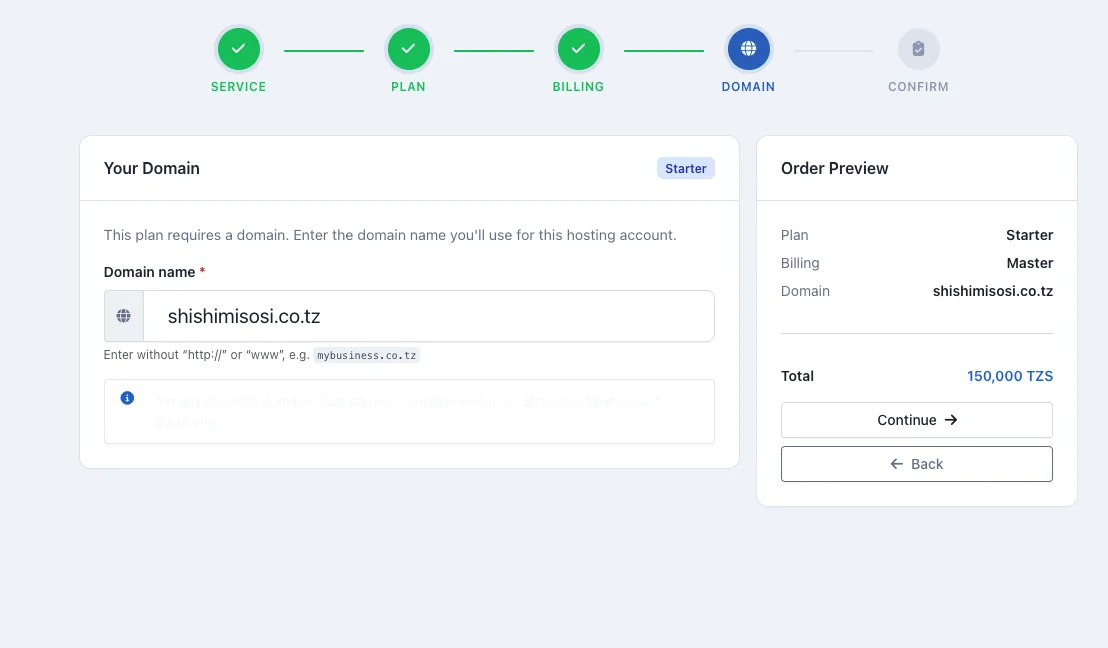
After selecting the domain, the next screen is the Domain Registration Order page. Treat this as a review step: confirm the selected domain, check which contact profile will be used, decide whether to add optional services, and verify the total before continuing.
Confirm the selected domain and term
Under Selected Domain, you should see the exact name you chose earlier, such as myfirstsite.co.tz. Right below it, the registration period is shown as 1 Year.
In the example shown, there is no separate selector visible for changing the registration length on this screen. That means this page should be treated as a confirmation step rather than a place to adjust the term.
Select the correct contact profile
Under Contact Information, the Select Contact Profile dropdown determines which saved contact details will be attached to the registration. In the example, the selected value is Primary Contact.
If your account has more than one contact profile, make sure the correct one is selected. A business domain may need the company profile, while a personal project may use your individual details. Choosing the right profile now makes future administration much easier.
Review optional WHOIS privacy and the total
The page also shows an optional add-on: Add WHOIS Privacy Protection. It is not required unless you deliberately choose it. Whether you want it depends on how the domain will be used and what privacy options apply to that extension.
On the right, the Order Summary shows the charges. In the example, the domain registration total is TZS 25,000.00, and the overall total is also TZS 25,000.00. That tells you no extra paid option has changed the amount in this case.
Once the selected domain, registration period, contact profile, optional privacy choice, and total all look correct, click Proceed to Payment.
Warning: The supplied order screen is for reviewing the domain, contact profile, optional add-ons, and amount due. It does not show nameserver configuration, so do not expect to set nameservers here.
Create or Log In to Your Account
After you proceed, the order needs to be attached to a client account. That account is what ties together registration, invoices, renewals, and the domain management area.
The screenshots provided do not show the actual sign-in or account-creation form, so this guide stays precise about what is visible. What the later screenshots do confirm is that you must be authenticated before you can access the client dashboard pages for domains and invoices.
Why this step matters
If you are a new customer, expect to create an account during checkout or around this stage. If you already have an account, sign in so the new domain lands in the same client area where you will later manage DNS, nameservers, and renewal settings.
- Your invoice history needs to appear under the correct customer account.
- Your domain needs to be attached to the same client area you will use for ongoing management.
What the logged-in Domains area looks like
Once signed in, the client area includes a left-hand sidebar and a Domains section. In the screenshot, that section opens a domain search page inside the dashboard rather than sending you back to the public site.
The main panel shows a search interface titled Find Your Perfect Domain, with Register and Transfer tabs. It also shows quick extension buttons for .ai, .co.tz, .com, .net, and .org, plus a Help me choose a domain link.
Tip: If you already have a Momo Cloud account, use that existing account instead of creating a second one for the same business or personal identity. Keeping domains, invoices, and renewals under one profile makes management much simpler.
Complete Payment
After you click Proceed to Payment, the flow shown in the screenshots moves to an invoice page inside the client area. The registration is presented as a bill that must be settled before the order is completed.
What the invoice shows
In the example, the invoice screen includes Invoice #INV-20260605-URDWI4. It also shows the issue date as Jun 05, 2026, the due date as Jun 12, 2026, the status as Pending, and the amount due as TZS 25,000.00.
The line item is listed as Domain Registration: myfirstsite.co.tz, with Registration Period: 1 year. This is the place to confirm that the domain name, extension, and term match what you intended to buy.
The screenshots clearly show the invoice stage, but they do not show the final payment gateway or a successful-payment confirmation page. What they do support is this: the next practical step is to pay the invoice and then return to the client area to confirm that the domain appears under your account.
Tip: Before paying, compare the invoice item against your original search result and order summary. Make sure the billed domain is the exact domain you want to own and manage.
Access Your Domain Dashboard
Once payment is completed and the registration is processed, the domain should appear in the Domains area of your Momo Cloud dashboard. This is the main place you will return to for status checks, nameserver changes, renewal settings, and other domain controls.
What to check on the overview page
The first thing to confirm is that the correct domain is displayed at the top. In the example, the domain is myfirstsite.co.tz and the status is Active. The overview also shows the registration date, expiry date, registrar, and Last synced information.
You will also see summary cards such as Days registered and Days until expiry. These make it easier to judge the lifecycle of the domain at a glance, especially if you manage more than one name.
Tabs and controls you will use later
The visible tabs include Overview, Nameservers, Security, Actions, and Child Nameservers. In the top-right area, the page also shows Sync and Back buttons. Sync is useful when you want the panel to refresh the latest registrar data after a recent change.
Tip: Right after registration, compare the registration and expiry dates on the dashboard against your invoice. If anything looks inconsistent, use those dashboard details as your reference when contacting support.
Manage DNS and Nameservers
After the domain is active, the next question is usually DNS: pointing the domain to a website, connecting email, or verifying a third-party service. The important distinction is that DNS records and nameservers are related, but they are not the same thing.
DNS records vs nameservers
- Nameservers decide which DNS provider is authoritative for your domain.
- DNS records are the actual entries stored at that provider, such as
A,AAAA,CNAME,MX, andTXT.
Changing nameservers means moving DNS authority. Editing DNS records means changing the data inside the currently authoritative zone. For example, setting nameservers to ns1.example-dns.com and ns2.example-dns.com is a different action from adding an A record that points myfirstsite.co.tz to 203.0.113.10.
Where DNS records are managed
The screenshots provided for this guide show the overview page, the nameserver screen, and the child nameserver tool, but they do not show a DNS record editor. Because of that, this guide does not invent a click-by-click path for adding records.
The safest rule is simple: add records wherever the authoritative DNS zone is hosted. If the domain uses Momo Cloud-managed nameservers, look for a dedicated DNS management area there. If the domain uses custom nameservers from another provider, add the records in that provider's dashboard instead.
Using the Nameservers tab
In the screenshot, the Nameservers tab shows two choices: Default Nameservers and Custom Nameservers. The visible default values are ns1.zepson.com and ns2.zepson.com.
If your domain should keep using the standard DNS setup provided through the platform, leave the default option selected. If another provider has given you specific nameserver values, switch to Custom Nameservers and enter exactly what they supplied.
The same page shows Sync and Update controls. Use Update to submit a change and Sync to refresh what the page displays afterward.
A safe way to make changes
- Collect the exact nameserver values from the provider you intend to use.
- Open the domain and go to the Nameservers tab.
- Select Custom Nameservers if needed.
- Enter the values exactly as supplied.
- Click Update.
- Use Sync and confirm the current nameserver list shows the expected values.
- Allow time for propagation.
Warning: Use custom nameservers only when you have the correct values from the provider that will host your DNS. Incorrect nameservers can take a website offline, stop email delivery, or break verification records until the settings are corrected and propagation finishes.
Manage Renewal and Security
Good domain management does not end after registration. You also need to keep the domain from expiring unexpectedly and review the basic security controls shown in the dashboard.
Watch auto-renew and expiry
The overview page shows the expiry date and how many days remain before expiry. It also includes an Auto-renew toggle. When enabled, it helps reduce the risk of a domain lapsing because you forgot to renew manually.
That matters even more for business-critical domains. If a website, email system, portal, or API depends on the domain, an expired registration can affect all of them at once.
Check privacy and transfer lock
The overview also shows WHOIS privacy and transfer lock status. In the example, both are shown as off, with a note indicating they can be managed from the Security tab.
That separation is useful: Overview is for quick status checks, Nameservers is for DNS delegation, and Security is where privacy and lock-related options are handled.
Tip: Enable Auto-renew for any domain tied to a live website, business email, billing portal, API endpoint, or customer-facing application. It is one of the simplest ways to reduce expiry risk.
Important Fields to Understand
Most domain questions come down to a few key fields: what domain you bought, how long it is registered for, which contact profile is attached, where DNS is delegated, and whether the invoice has been paid.
Domain name, term, contact profile, and privacy
The domain name is the full address you register, such as myfirstsite.co.tz. The extension, or TLD, is the ending such as .co.tz. That matters because myfirstsite.co.tz, myfirstsite.com, and myfirstsite.or.tz are separate domain registrations.
Registration Period tells you how long the domain is being registered for in that order. In the example, it is 1 year. Contact Profile is the saved identity attached to the registration, such as Primary Contact. WHOIS Privacy Protection is an optional service for supported domain types that helps limit public exposure of registration details.
Tip: Privacy protection does not replace accurate ownership details. Keep your contact profile correct in your Momo Cloud account even if WHOIS privacy is enabled.
Invoice fields
Invoice labels answer different questions: the invoice number identifies the bill, the status shows whether it is still open, the amount due shows the unpaid balance, and the issue and due dates show the billing timeline.
| Field | What it tells you | Example interpretation |
|---|---|---|
| Invoice number | The unique reference for that bill | Use it when matching a payment or contacting support |
| Status | Whether the invoice is paid or still open | Pending means action or confirmation is still needed |
| Amount due | The unpaid balance remaining | TZS 25,000.00 means that amount is still outstanding |
| Issue date | When the invoice was created | The billing process started on that date |
| Due date | When payment should be completed | Pay before this date to avoid delays or service risk |
Default, custom, and child nameservers
Default Nameservers use the standard DNS service already connected to the domain. Custom Nameservers delegate DNS to another provider. Child Nameservers are private nameservers under your own domain, such as ns1.myfirstsite.co.tz.
| Option | Used for | Typical example |
|---|---|---|
| Default Nameservers | Using the standard DNS service already connected to the domain | ns1.provider-domain.tld, ns2.provider-domain.tld |
| Custom Nameservers | Delegating DNS to another provider | ns1.externaldns.com, ns2.externaldns.com |
| Child Nameservers | Creating private nameservers under your own domain | ns1.myfirstsite.co.tz, ns2.myfirstsite.co.tz |
Create Child Nameservers if Needed
The Child Nameservers tab is an advanced feature for creating private nameservers under your own domain. These are also called glue records. Most domain owners will not need this section, but it is useful if you plan to run your own DNS service with hostnames such as ns1.myfirstsite.co.tz and ns2.myfirstsite.co.tz.
How the form works
The form usually shows rows for prefixes such as ns1, ns2, ns3, and ns4. The domain suffix is shown automatically, so entering ns1 under myfirstsite.co.tz creates ns1.myfirstsite.co.tz.
Each row also includes an IP address field and its own Add button. That IP is the glue address required for the child nameserver to work. A hostname without at least one glue IP is incomplete.
When to use it
- you are running your own authoritative DNS servers
- you want branded private nameservers under your own domain
- you manage reseller or multi-tenant hosting and want customers to use your own
ns1/ns2hostnames
For most website, email, or business landing page setups, you do not need to create child nameservers. Using the default nameservers or entering custom nameservers from your DNS provider is usually enough.
Tip: Only create child nameservers if you already have DNS software or a managed DNS service configured to answer queries on the IP addresses you enter. Registering ns1 and ns2 alone does not make them work.
Common Mistakes to Avoid
Most domain problems come from a few small assumptions. Avoiding them will save you from broken DNS, missed renewals, and preventable billing issues.
- Paying for the wrong domain: confirm the spelling and extension before proceeding.
- Assuming the term can be edited on the review screen: if the page only shows
1 Yearand no selector, treat that as the term being ordered. - Changing nameservers when you really meant to edit DNS records: nameservers choose the DNS provider; records are the contents of the zone.
- Ignoring invoice status or due date: a Pending invoice still needs payment attention.
- Leaving auto-renew off and forgetting the expiry date: manual renewal works only if someone is actively watching it.
Warning: Do not change nameservers unless you know where the active DNS zone is hosted and have confirmed that all required web, mail, and verification records exist on the destination provider.
Conclusion and Support
Once you understand the flow, domain management on Momo Cloud becomes straightforward: search carefully, register the correct domain, review the order details, pay the invoice, and then manage everything from your dashboard at cloud.momo.tz. From there, you can check status, update nameservers, review security options, and keep renewal settings under control.
If anything looks different from the examples, if a payment remains pending longer than expected, or if you are unsure whether you should change nameservers or edit DNS records, contact Momo Cloud support before guessing. When you do, include the exact domain name, any invoice or order reference, and a short explanation of what you expected to happen. That makes it much faster to resolve the issue and get your domain set up correctly.